
Owning a hot tub is one of the luxuries of life. But eventually, every hot tub owner asks “what do I do if my hot tub is leaking?”
With a leaking hot tub, first, remove the paneling to locate the leak. The most likely causes will be a rubber gasket at the heater connections, a cracked pipe, or a loose jet. If it’s not possible to access the leak’s location, use leak fix products for small leaks, or waterproof epoxy putty for larger leaks.
But there’s a lot more that goes into fixing hot tub leaks than that!
That’s why, today, we’ll be showing you everything you need to know about leaky hot tubs. And sometimes it’s not obvious where the leak is coming from!
Click here to read my ultimate guide to identifying where you have a hot tub leak. In that, I go over the causes, fixes, and telltale signs.
We know that it’s going to seem like a lot of information, so we’ll be breaking everything down into easy-to-read sections for you.
Those sections will look like this:
- What causes a hot tub to leak?
- How do I find a leak in my hot tub?
- Why is my hot tub leaking from the bottom?
- How do I fix a leak in my hot tub?
- Can a crack in a hot tub shell be fixed?
- How to fix it when your hot tub only leaks when the jets are on
- How to repair cracked hot tub pipes
Feel free to skip around at your leisure, but it’s definitely best to pay attention to each and every section.
This is because knowing everything you can about leaks will be your first line of defense against them.
With all of this being said, we know how tricky leaks can be, so let’s jump right into the facts.
What causes a hot tub to leak?
A broken or worn rubber gasket on either end of the heater connection is a common cause of hot tub leaks. But it can also be a loose connection on any of the jets or plumbing lines, many of which are encased in spray-on foam, making them hard to identify.
It may seem simple, water in and water out. But there are a lot more moving parts than you may initially think.
So what causes leaks? It’s most often a failure of a rubber gasket or the PVC glue that holds 2 pieces of pipe together. Or an actual crack in a PVC pipe.
The water going through the equipment is often upwards of 104° F. That’s also a lot of heat being applied to everything, often 24/7. So normal wear and tear is the culprit. Luckily, most of it is easily fixed, which we get into below.
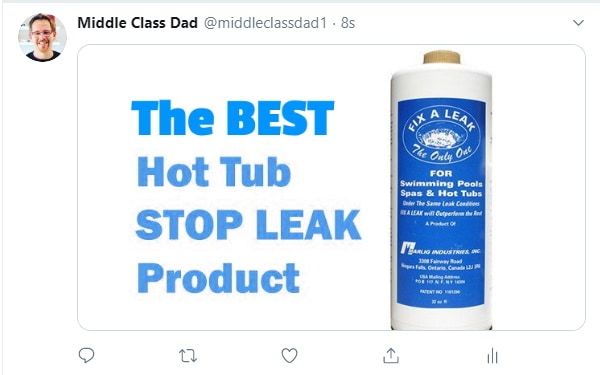
But for small holes (like smaller than a dime), sometimes Marlig-Fix-a-Leak will work!
Click here to read my complete review of Marlig Fix-a-Leak. I have used it on 2 of my 4 hot tubs and always keep a bottle on hand. But there are times when it won’t work. So it’s crucial to know what those are so you aren’t literally pouring money down the drain.
Of course, age is always a factor as hot tubs don’t last forever.
So if you’re wondering whether or not it’s simply time to replace your hot tub or fix it, make sure to check out a recent article I published. In it, I cover the lifespan of hot tubs, including all the different types.
Just click that link to see it now on my site.
Oh dear ! Our second #Hydropool hot tub has sprung a leak ! pic.twitter.com/ol8c92aQdp
— Jean Christina Keen (@JeanChatterbox2) February 18, 2017
How do I find a leak in my hot tub?
To find a leak in a hot tub, remove the side panels, and note where the water is pooling on the ground. That will be directly under the leak. If you see wet foam and the source is unclear, the leak is probably inside the spray-on foam, making it very problematic to repair other than using liquid fix-a-leak products.
But, in this section, we’ll be breaking all of those steps down for you.
So before we begin to dive into some popular searching methods, we’ll layout the areas you need to check:
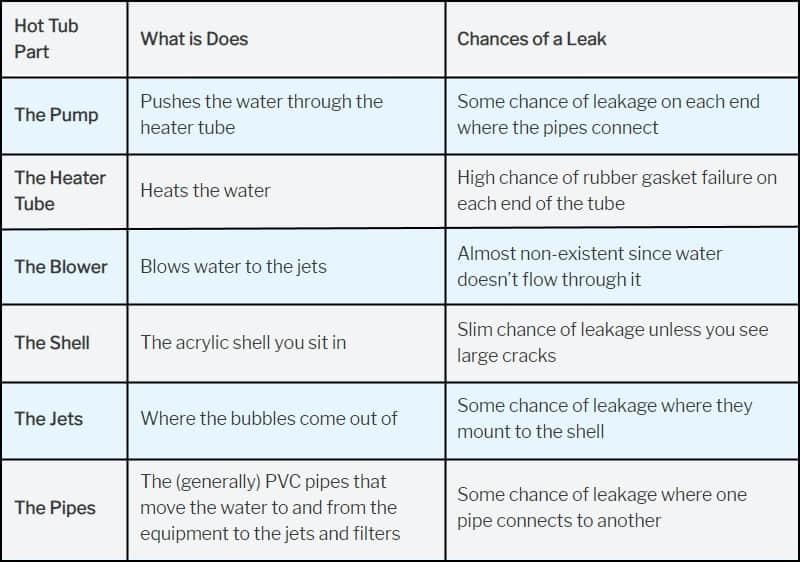
A leak can come from any of these areas. Luckily, if this seems overwhelming, we have some great methods for you to follow for each area.
Our just about $10k @bullfrogspas hot tub is less than a year old and already has a leak. It’s up on blocks now with pilot holes drilled into the bottom base to find the leak. Next steps is to saw into the bottom to find the leak… Tell me how this isn’t ruining my hot tub? pic.twitter.com/s9CXtAXXK9
— Greg Nelson (@iastater09) September 17, 2021
Why is my hot tub leaking from the bottom?
Ultimately gravity will cause most hot tub leaks to pool on the ground at the bottom. The source of the leak can still be from the jets, a cracked PVC pipe, or a worn rubber gasket in the heater unions. But the leak could also be a crack in the shell or a loose light fixture.
Unfortunately, a hot tub can leak from numerous places.
Because of that, there isn’t one answer to this question. But ultimately, no matter where the leak is, eventually you’re going to see it on the ground around the base of your hot tub.
Here are some of the most common reasons:
- The light – If your hot tub has a light at the bottom, that light housing can become a bit loose. If that happens, it can cause a leak on the bottom
- The Jets – If any of the jets are leaking, or the connections between the pipe and shell are leaking, this will cause water to leak out of the bottom
- The shell – a crack in the shell can be the culprit. Cracks around the top are easy to spot. However, if you have a crack below the water, you may not know it’s there without draining the water. Looking behind the paneling may not reveal that either due to insulation and spray-on foam
- Gaskets in the plumping – These are rubber and wear out over time. Replacing them is the only option when they fail
We get into fixes for each of these issues below. But troubleshooting to figure out which area is the cause is crucial.
Gah!!!!! Please tell me the hot tub didn’t spring a leak in this weather ???? pic.twitter.com/muR7lpf8gl
— Jodi B (@lttlteapot) February 20, 2019
How do I fix a leak in my hot tub?
To fix a hot tub leak, first, identify the source. For leaks smaller than 1/8 of an inch, use a liquid fix-a-leak product. Worn rubber gaskets or cracked PVC pipes will need to be replaced. Small cracks in the acrylic shell can be patched, and waterproof epoxy can also be used in inconspicuous places.
Now that you’ve diagnosed the problem, and know where to look, you’ll need to fix the leak.
Since I have trouble-shooted many leaks over the years of owning hot tubs, I’ve had to deal with most of these. And being on a budget means I do most of the work myself.
Here, I break down each area prone to leaks and how to deal with each one:
A pump leak
The pump is what pushes the water coming from the hot tub into the heater tube.
Then the heated water exits the heater and goes back into the tub. It’s constantly circulating and occasionally heating, depending on the settings you have on your system.
The most likely places for a pump leak are going to be the connections on each end of it. It could be a worn gasket or a cracked pipe.
I cover both of those types of repairs below.
If you have to replace the pump
If the pump itself is leaking from the main body and not one of the connectors, it’s probably time to replace the pump itself.
I’ve done this myself and I outline the steps below:
- Buy a replacement pump that is roughly the same power as what you have (it does not need to be the same brand). Do make sure it is the same diameter connectors on each side of it (2″ PVC is most common). Also, make sure that the in and out connections are in the same position as the pump you have now.
- Turn the main breaker off since you’ll be dealing with electricity
- Either drain the water or, if your hot tub has gates (shut off valves), just close them as long as they are on either side of the pump.
- Disconnect the power cable to the old pump from the control box. Some brands just plug into the side of the control box making this easy. Others may require you to open the control box panel and unscrew the wires from inside (again, make sure the main power breaker is off).
- Loosen the connectors – With round vice grips, gently turn the connecting nuts on each end of the pump to the left if you are facing them
- Inspect the gaskets and replace them if needed. If the new pump came with gaskets just use those.
- Remove the old pump
- Place the new pump in and follow the above steps in reverse to connect it
A good replacement pump is this 5 hp pump from Waterway on Amazon (click to see the current price on Amazon).
A cracked shell
If your shell becomes has small cracks, don’t panic. Tiny little stress fractures are not uncommon. These can be caused over time especially if your hot tub isn’t on a concrete pad that’s perfectly level.
After all, filled with water and people, that thing weighs thousands of pounds. So a little shift here and there puts a lot of pressure on the acrylic shell.
The best way to fix a small crack in the acrylic shell is to do the following:
- Get a Plast-aid Acrylic Spa Repair kit (click to see on Amazon)
- Drill a small hole on each end of the crack using a drill bit just slightly larger than the crack itself. That will stop the crack from spreading and getting bigger
- Mix the dry and liquid spa repair glue in a cup; how much depends on how big the crack is
- Add a small amount of acrylic paint to the glue to match the color of your shell (optional)
- Spread a small amount into the crack and 2 holes
- Allow 15 minutes to cure, fuse, and harden
- Can be gently sanded and/or buffed smooth
CLICK HERE TO SEE THE ACRYLIC REPAIR KIT ON AMAZON
Unaffiliated Hot Tub Home Care offers specialized hot tub leak repair services to ensure that you get to enjoy your hot tub for years to come. #HotTubLeak #HotTubLeakRepair https://t.co/s06zKfuY0m pic.twitter.com/FWpjuHy8zO
— Unaffiliated Hot Tub Home Care (@UnaffiliatedC) October 22, 2019
The heating system
A heating element will fail over time. But that mostly causes it to not heat or to not heat to the proper temperature.
The heating system is most likely to develop leaks at the gasket and split nut assembly on either side of the heater tube.
That fix can be done yourself for about $20 bucks and I get into that in the section just below us.
Gaskets
Rubber gaskets fail over time.
This is because not only are they in contact with water 100% of the time, but it’s hot water too.
In my experience, the gaskets most prone to failure are the ones on either side of your heater tube. Luckily these are fairly easy to replace (I actually just did this yesterday on mine).
If you have 1 that failed (like I did), it’s a good idea to go ahead and replace both as chances are they are the same age and the other one is close to failure also.
Here’s how I replaced the gaskets and split nuts on my hot tub:
- Either drain the water or, if your hot tub has gates (shut off valves), just close them on each side of the control box that houses the heater tube
- Loosen the split nut by hand by turning left (if you were looking at it straight ahead). The split nut is typically a round black piece of plastic that screws onto the end of a pipe. However, it’s 2 halves instead of just one piece. You tighten the 2 halves together with screws
- Once the split nut is rotated to where you can get to both screws, use a screwdriver (typically Phillips) to loosen the screws and set them aside
- Remove the split nut (may need to be turned further)
- The gasket will be inside the split nut. Remove it and check for wear or if it’s broken
- While you can just replace the gasket, I replaced the split nut as well feeling like it had probably been worn a little too. You may be able to find this at a pool/hot tub supply store, but not likely at places like Home Depot. I also couldn’t find my exact one on Amazon. So I bought mine from SpaDepot.
- Place the new gasket in (it has a ridge that presses into the tube that connects to the heater
- Slip-on one half of the split nut, and then the other half
- Tighten the screws that connect the split nut halves
- Hand-tighten the split nut onto the pipe by turning to the right.
- Repeat the process for the other side of the heater tube
It’s a good idea to fill the tub back up before replacing the paneling in case you need to further tighten the split nuts. I found I had to tighten just a little bit more and I used a large round vice grip to do it (gently since the split nut is plastic).
Have a leaky hot tub?
Try checking the plumbing, pipes and jets. ????
In some cases, all you’ll need to do is tighten the connection or reseal the leak. ???? pic.twitter.com/B5OqcVSLus
— Quick Spa Parts (@QuickSpaParts) December 1, 2020
Can a crack in a hot tub shell be fixed?
Yes. Small cracks in a hot tub shell can be fixed. To fix, drill a small hole at each end of the crack to stop it from spreading. Then apply an acrylic patch. This can be mixed with acrylic paint to match the shell color. Once dry, it can be sanded and buffed smooth.
As we’ve mentioned in the previous section, a hot tub shell can definitely be fixed. The best way to fix a small crack in the acrylic shell is to do the following:
- Get a Plast-aid Acrylic Spa Repair kit (click to see on Amazon)
- Drill a small hole on each end of the crack using a drill bit just slightly larger than the crack itself. That will stop the crack from spreading and getting bigger
- Mix the dry and liquid spa repair glue in a cup; how much depends on how big the crack is
- Add a small amount of acrylic paint to the glue to match the color of your shell (optional)
- Spread a small amount into the crack and 2 holes
- Allow 15 minutes to cure, fuse, and harden
- Can be gently sanded and/or buffed smooth
CLICK HERE TO SEE THE ACRYLIC REPAIR KIT ON AMAZON
What if the shell is too far gone?
For larger cracks or a chunk missing, you can use the above process in larger amounts.
Just know that glue, however strong, isn’t designed to hold water under pressure, so really big gaps may require professional help.
How to fix it when your hot tub only leaks when the jets are on
In most cases, if your hot tub leaks when the jets are on, there’s either a small crack or a worn rubber gasket.
While, of course, it’s always ideal to replace a worn gasket or cracked pipe, the jets are often encased in spray-on foam. That makes them really hard to get to.
So before I go digging out the foam and crawling into the enclosed hot tub area, here’s what I like to try first.
I use Marlig Fix-a-Leak (click to see on Amazon)
This stuff is pretty amazing and I’ve used it many times for small leaks that would otherwise be hard to repair.
It works great. It’s also an Amazon’s Choice product with some great reviews.
This is a liquid that you simply pour into the suction area. You don’t have to drain the water before OR after using it. Just give it 24-48 hours to see if it fixed the leak.
Here are the steps to using it:
- Remove the filters and set aside
- Shake the bottle really well
- Pour about 1/4 of the bottle (if you got the 32 oz bottle) into the area where the filters were (it will get sucked into the pipes here
- Turn on all jets to get it moving through the hot tub plumbing for 6 hours
- Turn the system off (at the breaker would be the easiest way)
- Simply walk away and allow it to work for 24-48 hours
- Check back after 24-48 hours to see if there is still any evidence of leakage
- If no leak, replace the filters, check and adjust water chemicals if needed
- Wait another 48 hours before using
- If the leak has slowed but not been fixed, repeat the process
Fix-a-Leak is heavier than water, so it naturally sinks to the lowest place.
Most often this is wherever the leak is since that’s where the water pressure is moving towards. It can fill cracks up 1/8″ in diameter, so it’s perfect for tiny cracks that would be challenging to replace.
CLICK HERE TO CHECK OUT FIX-A-LEAK ON AMAZON
How to repair cracked hot tub pipes
A cracked pipe in a hot tub should be replaced. If you have gate valves, close them off & loosen the fittings on either side of the crack. Replace with a new piece. Glued pieces will need to be cut out with a saw. Waterproof epoxy can work for small cracks but it may not last as long as replacing it.
When it comes to the plumbing of a hot tub, there are a lot of pipes involved. While most pipes are extremely durable if one of them cracks you’ll want to know about how to fix it.
With a cracked pipe, the ideal solution is obviously to replace it. Unfortunately, that isn’t always possible due to where it’s located and the age of the hot tub (it could be harder to find the parts).
After all, while it seems odd to me, PVC pipes (which is what make up a lot of the hot tub piping) aren’t universal.
Think of them like cell phone chargers in 2002; each one can be a little different. Even if you find a 2″ piece, if it’s threaded, the thread may not be the same as your thread.
Luckily, there are steps you can take to fix a cracked pipe if you can’t replace it.
To replace a cracked pipe
If it’s a simple part that’s easily accessible and easy to replace, simply:
- Drain the hot tub
- Remove the cracked pipe (it could simply be screwed on which makes removal easy). If it’s glued, you’ll have to use a hacksaw to cut it out
- Replace with a new PVC pipe the same size
- If it’s a glued in piece, glue in and allow to fully set before filling with water (typically 2 hours)
Apply epoxy putty
Another way to repair pipes, and if these pipes are PVC this works all the better, is to use an epoxy putty like JB Water Weld (click to see on Amazon).
This stuff is great as it can literally be applied in wet conditions or even underwater!
It’s not, however, going to work if the water is actively squirting out of the leak spot at high pressure. A few drops, no problem.
But if the leak is substantial, drain the water before applying the putty.
Here’s how to use it:
- Break off a small piece (about 1″) and mix thoroughly with your hands (I like to wear latex gloves). Epoxy works by combining the 2 materials
- Press it over the leak and spread out so it conforms to the area (if this is behind your panels, how it looks obviously doesn’t matter)
- It will set within 25 minutes and harden within 1 hour
If the JB Weld is applied in a conspicuous area, just know it can be sanded and painted. But it helps if you apply it smoothly and neatly in the first place.
Here is a picture of JB Water Weld I used to fix 2 spots that were leaking.
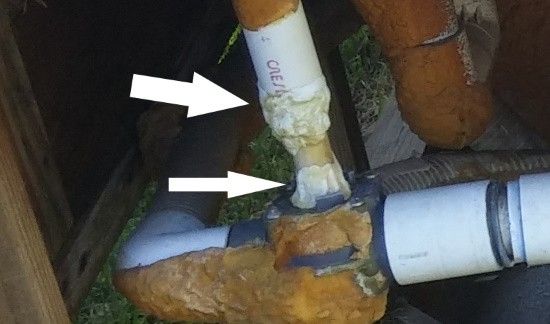
The JB Weld is the white putty stuff you see spread out on both ends of that small section. Since this is behind the paneling, how pretty it looked didn’t matter.
But it works!
CLICK HERE TO SEE JB WATER WELD ON AMAZON
Using a flexible coupling clamp
Sometimes there is simply a small leak where 2 pipes meet but it’s not easy to get those pipes out and replace them.
What I did once when I had this happen was to use what’s called a flexible coupling clamp (click to see on Amazon).
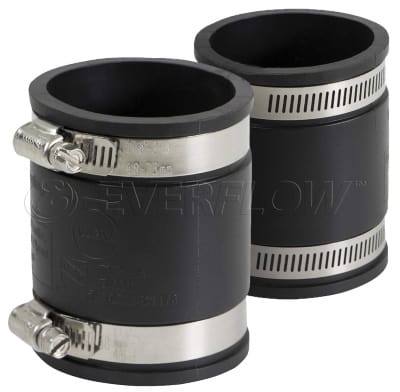
It’s a rubber sleeve (2″ is typical for a lot of hot tubs, but I did once have an older one that was 1.5″).
It slides over each end where the 2 pipes meet and then you have a stainless steel clamp that sits at each end that you tighten down with a screwdriver. It worked great for me and was MUCH easier than if I had replaced both pipes.
Here are the steps:
- Ideally, drain the hot tub (otherwise it could be spraying you while you’re doing this)
- Disconnect the 2 pipes where they meet
- Slide the rubber (with the loosened clamps) over one end
- Press the 2 pipes touching each other
- Slide the rubber back towards the other pipe so the center of the rubber sleeve is about where the 2 pieces meet
- Tighten (by hand) the 2 screws that control the clamps. Since you’ll be dealing with water under pressure you do want it to be tight. But obviously not so tight that you risk cracking the pipe
- It probably makes sense to fill the hot tub back up and see if any further tightening is needed before replacing the panel
CLICK HERE TO CHECK THIS OUT ON AMAZON (multiple sizes available too)
Final thoughts
While hot tubs may be more durable than ever, that doesn’t mean that they’re perfect.
Sometimes, no matter what you do, you’ll end up with a leak. But sometimes it’s hard to tell the difference between a leak and normal evaporation.
Click here to read my guide on exactly how to know the difference between a leak and water evaporation in your hot tub. I cover how much water levels drop from normal evaporation, and the key signs to look for if it’s really a leak.
So in this article, we reviewed all the most common types of leaks. We explored what causes them. But more importantly, a variety of ways to fix them.
Ultimately, we answered the question of what do I do if my hot tub is leaking?
We hope that this was helpful. Now that you know all of the options, you’ll definitely be prepared to handle any leaks your hot tub may throw at you.
Confused about hot tub chemicals?
Hot tub chemicals can be confusing. How much to add, which ones to buy, and are all of them really needed?
I take the confusion out of it in a recent article.
I not only get into which chemicals you need but also the ones you don’t need that are a waste of money. Then I also explore the chemicals that are best for sensitive skin and how to avoid hot tub rash.
So just click the link to read that now on my site.
As an Amazon Associate, I may earn a small commission from qualifying purchases if you click on Amazon from my site and choose to make a purchase. You can read my complete affiliate disclosure for more details.
- 25 Stunning Jacuzzi Outdoor Ideas You Must See - February 11, 2026
- Do Hot Tub Enzymes Work? (Better Than Chemicals?) - July 28, 2025
- How Do You Know if Your Hot Tub Sanitizer is Working? - July 28, 2025